 Views created in legacy LACES do
not transfer to LACES NexGen. You must recreate your views.
Views created in legacy LACES do
not transfer to LACES NexGen. You must recreate your views.
What is a view?
A view is made up of column names that display on the grid at each area, and can be changed by adding or removing columns. The columns that display in a specific view can be exported to CSV format (opens in Excel if Excel is installed on your computer) to create a customized report.
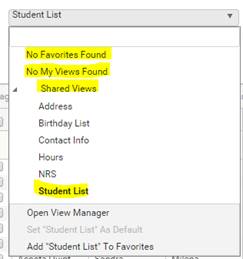
When you click the down arrow on the View dropdown list, the first item is Favorites. A favorite view is a view that you use often. Views that have been added to Favorites will display at the top of the list. ‘No Favorites Found’ will display if no views have been added to Favorites.
Views that you have created and saved display under ‘My Views’. ‘No My Views Found’ will display if you have not created any views.
Views created in legacy LACES do
not transfer to LACES NexGen. You must recreate your views.
‘Shared Views’ displays with an arrow in front that allows you to expand or collapse the list. While you may collapse the shared views, by default the list is expanded. Each area has predefined ‘Shared Views’ and a shared view is initially set as the default view. For example, the default view at the student area is ‘Student List.’ The default view always displays in bold.
Shared views are available to all users across all clients, and have been created to display columns of the most commonly used information. The order of the columns in a shared view cannot be changed. If you drag a column heading in a shared view to a different location on the grid, you will get the message:
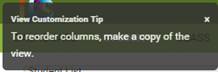
A shared view may be applied, set as a favorite, or set as the default. Shared views cannot be modified, but you may copy a shared view, make modifications to the copy, and then save with a new view name.
To select a new shared view:
1. Click the down arrow on the dropdown view field (or click in the field).
2. Click the shared view you wish to use.
3. Expand column headings as necessary.
4. The view and the column widths will remain in place while you are signed in unless you make changes.
Many of the shared views contain
the same columns. When a column width in one shared view is expanded, the
column is not expanded when a different shared view is applied that
contains that same column. You will have to expand the column in the
individual views.
If you have access to multiple agencies within your client, and then switch agencies, the default view set in that agency will be applied; changing the default view in one agency does not change the default view in all agencies that you have access to.
To add a view as a Favorite:
1. First, click the drop down view field and select the view.
2. Click the drop down view field again.
3. Click ‘Add <view name> to ‘Favorites.’
4. Click the drop down view field.
5. The view displays at the top under ‘Favorites.’
6. Click ‘Remove <view name> from Favorites’ to remove the view name from ‘Favorites.’
The view must be applied before you can add or remove it from ‘Favorites.’
To add a view as a Default:
1. First, click the drop down view field and select the view.
2. Click the drop down view field again.
3. Click ‘Set <view name> as Default.’
4. Click the drop down view field.
5. The new default view is bolded.
6. ‘Set <view name> as Default’ is grayed out.
7. The new default view will remain the default in that agency until you select a different view and set that view as the default.