New records may be added at the person (student, staff, tutor, contact, donor, and volunteer) and enrollment areas (class, group, pair, workshop), and the Material area. Click the ‘Add New’ toolbar icon to display an intake page for that area. Required fields are indicated with a red asterisk and must be entered prior to saving a record.
Each intake page has four buttons at the bottom:
|
Save |
saves the record and returns to the grid
|
|
Save and New |
saves the record and returns to a blank intake page
|
|
Save and Go |
saves the records and goes to the selected tab in the detail record
|
|
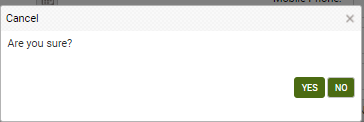
Cancel |
cancels the intake and returns to the grid
|
At the cancel window:
•You may press enter, or click Yes to return to the grid.
•You may press Tab, then Enter, or click No to terminate the cancel operation.

Common keystrokes when entering data on the intake pages:
|
Tab |
moves to the next field
|
|
Shift, Tab |
moves to the previous field
|
|
Up and down arrows |
move up or down in a choice list
|
|
Spacebar |
makes selection in option button or checkbox
|
|
Tab, Enter after the last field on the intake page |
saves record and returns to grid
|
|
Tab, Tab, Enter after the last field on the intake page
|
saves record and returns to a blank intake page |
 After tabbing from the ‘Gender’
field on the student intake page, the option button for Yes will be
selected on the ‘Hispanic/Latino’ field. If yes is correct, use the
spacebar to select, then the tab key to move to the next field. You can
also use the up or down arrow to select either Yes or No, then tab to the next
field.
